kenmore mini ultra sewing machine manual
Welcome to the Kenmore Mini Ultra Sewing Machine Manual, your ultimate guide to mastering this versatile sewing machine․ Designed for both beginners and experienced sewists, this manual provides detailed instructions on setup, threading, stitching, and maintenance․ Discover how to unlock the machine’s full potential with step-by-step guides and troubleshooting tips․
Overview of the Kenmore Mini Ultra Sewing Machine
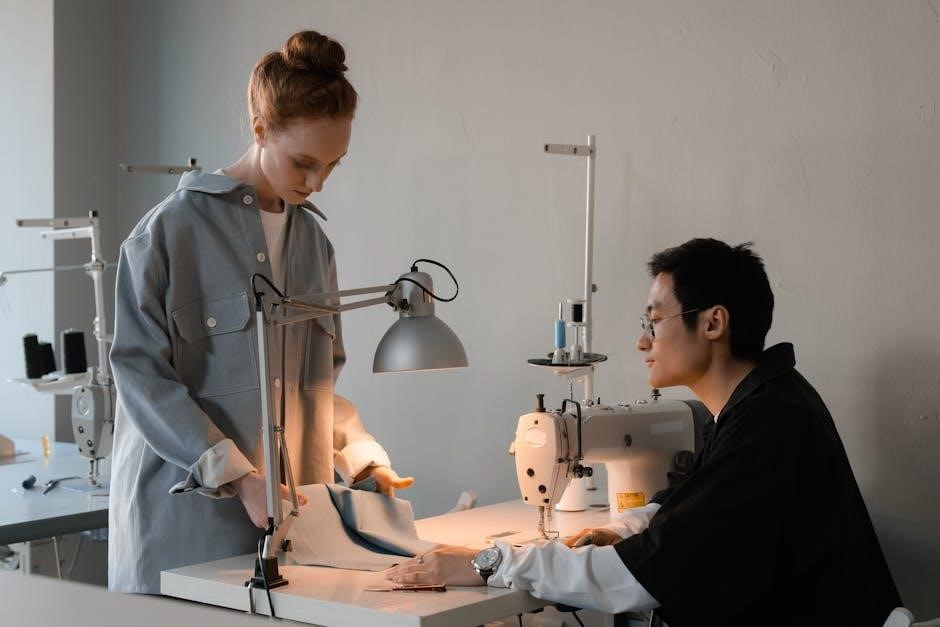
The Kenmore Mini Ultra Sewing Machine is a compact, lightweight, and portable sewing solution designed for versatility and ease of use․ It features a full rotary shuttle mechanism, ultra-stitch functionality for uniform stitching, and a sew-by-color system with preset stitch settings․ Ideal for both beginners and experienced sewists, this machine supports a variety of sewing projects, from basic repairs to decorative stitching․ Its compact size makes it perfect for small spaces while delivering professional-quality results․
Importance of Reading the Manual
Reading the Kenmore Mini Ultra Sewing Machine Manual is essential for understanding its features, operation, and maintenance․ It provides clear instructions for threading, bobbin winding, and adjusting thread tension, ensuring optimal performance․ The manual also includes troubleshooting tips to resolve common issues and safety guidelines to prevent accidents․ By following the manual, users can maximize the machine’s efficiency, avoid damage, and enjoy a seamless sewing experience․ It serves as a comprehensive guide to unlocking the machine’s full potential․
Key Features and Specifications
The Kenmore Mini Ultra Sewing Machine features a full rotary shuttle mechanism, ultra-stitch technology for uniform stitches, and a sew-by-color system with customizable stitch settings, ensuring precise sewing․
Full Rotary Shuttle Mechanism
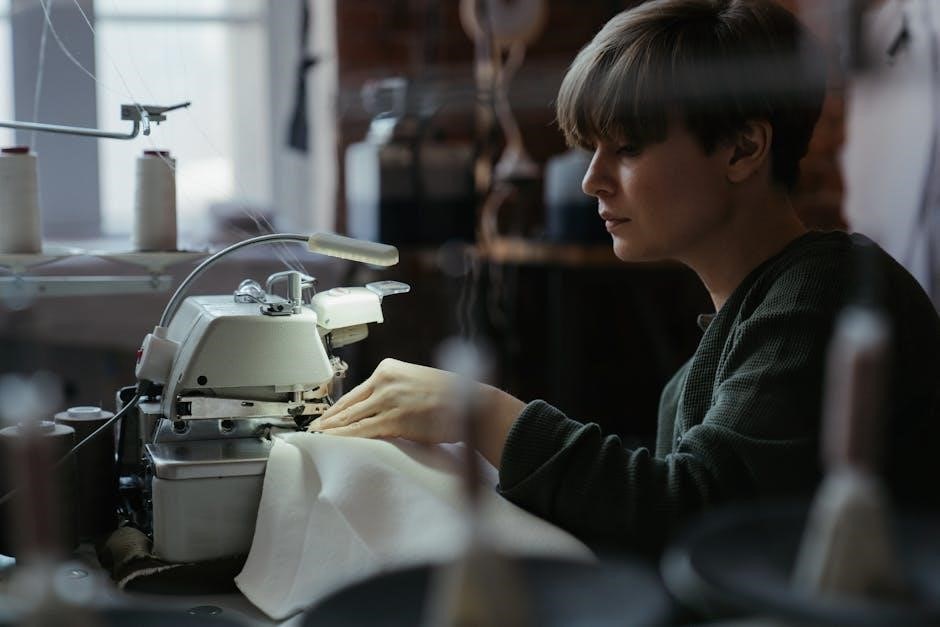
The Kenmore Mini Ultra Sewing Machine boasts a full rotary shuttle mechanism, designed for smooth and efficient stitching․ This mechanism ensures consistent fabric feed and robust stitch formation, making it ideal for a variety of fabrics, from delicate silks to heavy-duty materials․ The rotary shuttle mechanism is durable and requires minimal maintenance, ensuring long-lasting performance․ It also allows for easy bobbin replacement and trouble-free sewing experiences, making it a reliable choice for sewists of all skill levels․ This feature is a testament to the machine’s versatility and reliability in handling diverse sewing tasks with ease and precision․
Ultra-Stitch Feature for Uniform Stitches
The Ultra-Stitch feature on the Kenmore Mini Ultra Sewing Machine ensures consistent and uniform stitches, perfect for both straight and decorative sewing․ This innovative technology automatically adjusts stitch length and width, providing professional-quality results․ It simplifies sewing for beginners while offering precision for experienced sewists․ The Ultra-Stitch feature is ideal for various fabrics, from lightweight materials to heavy-duty textiles, ensuring flawless stitching every time․ This feature enhances the machine’s versatility and delivers reliable performance for all your sewing projects․
Sew-by-Color Feature with Stitch Settings
The Sew-by-Color feature on the Kenmore Mini Ultra Sewing Machine offers an intuitive way to select stitches based on color-coded settings․ Each stitch type is assigned a specific color, making it easy to navigate and choose the right stitch for your project․ With adjustable stitch settings, you can customize length, width, and tension for optimal results․ This feature is particularly helpful for beginners, ensuring that you can quickly and confidently achieve the desired stitch quality for various fabrics and techniques․ This innovative design streamlines the sewing process, making it both efficient and enjoyable․
Unboxing and Initial Setup
Unbox your Kenmore Mini Ultra Sewing Machine and inspect all included parts, such as the bobbin, needle, and accessories․ Carefully remove packaging materials and ensure no damage occurred during shipping․ Locate the mini screwdriver and rubber ring for initial adjustments․ Familiarize yourself with the machine’s exterior components, including the spool pins, tension dials, and stitch selectors․ This step ensures a smooth start to your sewing journey․
Parts and Accessories Included
Your Kenmore Mini Ultra Sewing Machine comes with essential parts and accessories to get you started․ Inside the box, you’ll find the sewing machine itself, a bobbin, a mini screwdriver, a rubber ring, a standard presser foot, and a set of needles․ Additional accessories may include a seam ripper, a spool pin, and a small compartment for storing supplies․ These components ensure you have everything needed for basic sewing tasks and minor adjustments․ Always check for any missing items before first use․
Preparing the Machine for First Use
Before using your Kenmore Mini Ultra Sewing Machine, carefully unpack and inspect it for any damage․ Apply a few drops of sewing machine oil to the recommended areas to ensure smooth operation․ Consult the manual for specific oiling points․ Next, wind the bobbin and thread the machine as instructed․ Familiarize yourself with the controls and settings․ Finally, test the machine on a scrap piece of fabric to ensure proper function․ This preparation ensures a seamless sewing experience․
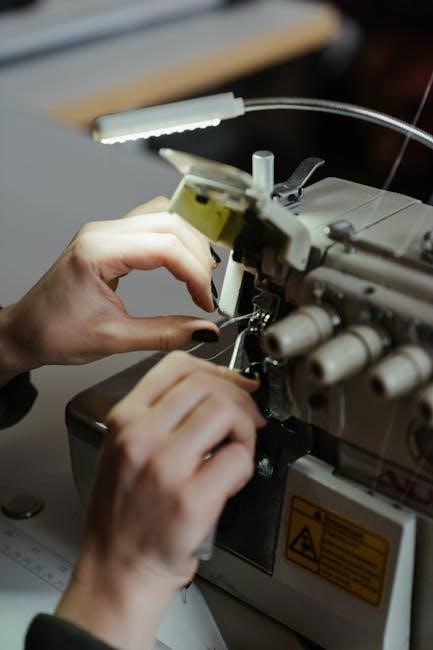
Threading and Bobbin Winding
Proper threading and bobbin winding are essential for smooth operation․ Follow the manual’s step-by-step guide to thread the machine correctly and wind the bobbin evenly for consistent stitches․
Step-by-Step Threading Guide
Start by pulling the handwheel out to disengage the needle bar․ Gently draw thread from the spool and guide it through the thread guide․ Loop the thread around the tension discs, ensuring it’s seated properly․ Pass the thread through the take-up lever and down to the needle․ Leave a small tail and insert the needle․ Secure the thread at the machine’s end․ For the bobbin, wind it evenly, then place it in the bobbin case․ Adjust the tension dial as needed for consistent stitches․
Wind the Bobbin Correctly
To wind the bobbin, insert the thread into the bobbin winder and hold it firmly․ Turn the handwheel clockwise to start winding․ Keep the thread taut but not too tight․ Once the bobbin is nearly full, cut the thread and secure the end․ Remove the bobbin and place it in the bobbin case․ Ensure the bobbin is evenly wound and not overfilled, as this can cause tension issues․ Properly wound bobbins ensure smooth stitching and prevent machine jamming during operation․
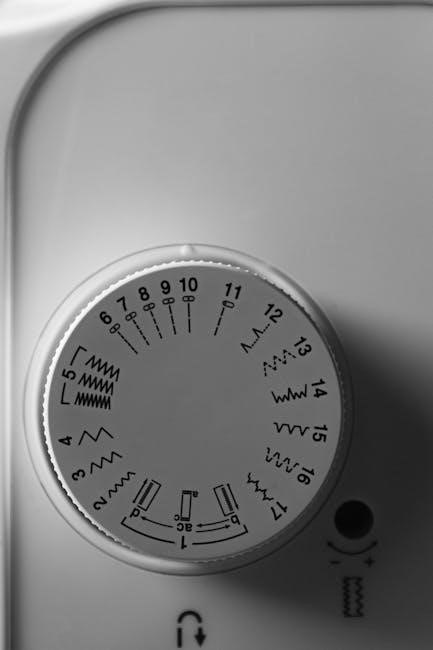
Stitch Options and Adjustments
Explore various stitch options, including decorative and zigzag stitches, to enhance your sewing projects․ Adjust thread tension and stitch length for optimal results․ Customize settings easily․
Decorative Stitches and Zigzag Functionality
The Kenmore Mini Ultra Sewing Machine offers a variety of decorative stitches and zigzag functionality to add creativity to your projects․ Use the stitch selector to choose from multiple patterns, perfect for embellishing fabrics, creating borders, or adding texture․ The zigzag stitch is ideal for finishing seams or sewing stretchy fabrics․ With adjustable stitch width and length, you can customize the appearance of your stitches to suit any fabric type․ This feature enhances both functionality and creativity, making your sewing projects stand out․
Adjusting Thread Tension for Optimal Results
Adjusting thread tension is crucial for achieving optimal sewing results․ Proper tension ensures even stitches and prevents fabric puckering or loose threading․ To adjust, locate the tension dial on your Kenmore Mini Ultra Sewing Machine․ Turn the dial clockwise to tighten the thread or counterclockwise to loosen it; Always test the tension by sewing a small sample to ensure it’s balanced․ Correct thread tension enhances stitch quality and overall sewing performance․
Maintenance and Troubleshooting
Regular maintenance ensures smooth operation․ Clean and oil the machine periodically․ Check for tangled threads and proper needle alignment․ Address common issues promptly for optimal sewing performance․
Oiling the Machine for Smooth Operation
Regular oiling is essential for maintaining your Kenmore Mini Ultra Sewing Machine’s performance․ Use high-quality sewing machine oil to lubricate moving parts, such as the shuttle hook and bearings․ Clean the machine thoroughly before applying oil to ensure proper absorption․ Apply a few drops to the recommended areas, as specified in the manual․ Oil the machine after every 10 hours of use or when you notice increased noise or friction․ Turn the handwheel gently to distribute the oil evenly․ Avoid over-oiling, as it may attract dust and cause issues․ Proper lubrication ensures smooth stitching and extends the machine’s lifespan․
Common Issues and Solutions
Experience issues with your Kenmore Mini Ultra Sewing Machine? Consult this section for quick solutions․ Thread breakage? Check for proper threading and tension․ Uneven stitches? Adjust the stitch length or tension settings․ Machine not turning on? Ensure the power cord is securely connected․ Bobbin issues? Verify correct bobbin placement and winding․ For persistent problems, refer to the troubleshooting guide or contact Kenmore support․ Regular maintenance and proper usage ensure optimal performance and extend the machine’s lifespan․
Accessories and Additional Features
Explore the Kenmore Mini Ultra Sewing Machine’s optional presser feet, decorative stitch options, and included tools like the mini screwdriver and rubber ring for enhanced sewing experiences․
Optional Presser Feet and Attachments
The Kenmore Mini Ultra Sewing Machine supports a variety of optional presser feet and attachments to enhance your sewing experience․ These include a zipper foot for precise zipper installations, a buttonhole attachment for custom buttons, and a blind hem foot for invisible hems․ Additional accessories like the mini screwdriver and rubber ring are included for easy maintenance and adjustments․ Explore these attachments to expand your machine’s capabilities and tackle diverse sewing projects with ease and precision․
Using the Included Mini Screw Driver and Rubber Ring
The Kenmore Mini Ultra Sewing Machine comes with a mini screwdriver and rubber ring for easy adjustments and maintenance․ Use the screwdriver to tighten or loosen parts like the bobbin case or presser foot․ The rubber ring assists in securing small components, ensuring stability during operation․ These tools are essential for keeping your machine in optimal working condition and are conveniently included for your convenience․
Downloading the Manual
Easily download the Kenmore Mini Ultra Sewing Machine Manual (model 385․11206300) from Sears Parts Direct or official Kenmore resources as a PDF for convenient access․
How to Access the PDF Manual Online
To access the Kenmore Mini Ultra Sewing Machine Manual, visit Sears Parts Direct or official Kenmore resources․ Enter the model number (385․11206300) in the search bar to locate the PDF manual․ Download the file for free or purchase a printed copy if preferred․ The manual is available in English, Spanish, and French, ensuring accessibility for all users․ It includes detailed instructions, diagrams, and troubleshooting guides to help you optimize your sewing experience․ Warranty and product information are also included for your reference․
- Visit Sears Parts Direct or Kenmore’s official website․
- Search for model 385․11206300․
- Download the PDF manual for free․
- Access instructions, diagrams, and troubleshooting tips․
Resources for Kenmore Sewing Machine Manuals
Access Kenmore sewing machine manuals through Sears Parts Direct or Kenmore’s official website․ Enter your model number (e․g․, 385․11206300) to download or print the PDF manual․ These resources provide detailed instructions, diagrams, and troubleshooting guides; Additionally, third-party sites offer downloadable manuals, ensuring easy access to information for maintaining and operating your Kenmore Mini Ultra Sewing Machine․
- Visit Sears Parts Direct or Kenmore’s website․
- Search using your machine’s model number․
- Download or print the PDF manual for free․
- Check third-party sites for additional resources․
Safety Guidelines
- Always unplug the machine when not in use or before cleaning․
- Keep loose clothing and long hair tied back while sewing․
- Avoid sewing over pins to prevent needle breakage․
- Use the machine on a stable, flat surface․
- Keep children and pets away while operating․
Precautions for Safe Operation
- Always unplug the machine when not in use or before cleaning․
- Keep loose clothing and long hair tied back to avoid accidents․
- Never sew over pins, as this can damage the needle or machine․
- Ensure the machine is placed on a stable, flat surface․
- Keep children and pets away while operating the machine․
- Avoid touching moving parts or the needle with bare hands․
- Use only recommended needles and threads for your machine․
- Refer to the manual for proper handling of attachments and presser feet․
Warranty and Product Information
Your Kenmore Mini Ultra Sewing Machine is backed by a limited warranty covering defects in materials and workmanship․ For details, refer to the warranty section in your manual․ The machine is designed for lightweight sewing tasks, making it ideal for small projects and repairs․ Model number 385․11206300 ensures compatibility with genuine Kenmore parts and accessories․ Register your product to activate warranty benefits and gain access to exclusive support services․
Mastering your Kenmore Mini Ultra Sewing Machine opens the door to endless creative possibilities․ With its user-friendly design and versatile features, it’s perfect for both beginners and experienced sewists․ Follow the manual’s guidance to ensure optimal performance and longevity․ Happy sewing!
Final Tips for Getting the Most Out of Your Machine
To maximize your Kenmore Mini Ultra Sewing Machine’s potential, keep it well-maintained and experiment with its features․ Regularly clean and oil the machine to ensure smooth operation․ Explore decorative stitches and zigzag functions for creative projects․ Use the correct presser feet for specific tasks, such as zigzag or buttonholes․ Practice on scrap fabric before working on final pieces․ Store the machine in a dry, cool place to prevent damage․ Happy sewing!