maytag gemini double oven owners manual
Maytag Gemini Double Oven Owners Manual: A Comprehensive Guide (Updated 04/07/2026)
This manual details the Maytag Gemini MET8720DS, acknowledging its inconsistent performance and limited advanced features despite offering dual oven convenience.
Welcome to the comprehensive owner’s manual for your Maytag Gemini double oven, specifically addressing models like the MET8720DS. This guide is designed to help you understand and effectively utilize all the features of your appliance, ensuring optimal cooking performance and longevity. The Gemini series aims to provide the convenience of two ovens in a single unit, but as noted, it’s crucial to be aware of potential inconsistencies in performance.
This manual will walk you through everything from initial setup and control panel operation to troubleshooting common issues and performing routine maintenance. We’ll address the unique aspects of both the upper and lower oven compartments, including baking, broiling, convection cooking, and the self-cleaning cycle. Understanding these nuances will maximize your cooking experience.
Understanding Your Model Number (MET8720DS & Others)
Your Maytag Gemini double oven’s model number, such as MET8720DS, is crucial for accessing specific support and replacement parts. This alphanumeric code identifies the exact configuration of your appliance, including features and manufacturing date. Locate the model number on the appliance’s serial plate, typically found inside the oven frame or on the back panel.
Knowing your model number allows Maytag customer service to provide tailored assistance and ensures you receive the correct documentation. While this manual broadly covers the Gemini series, slight variations may exist between different models. Referencing your specific model number when contacting support or ordering parts is essential for accurate service. Remember, consistent performance isn’t always guaranteed with this series.
Oven Features & Controls
The Maytag Gemini offers dual ovens, but features are limited; understanding the control panel and digital display is key to operation.
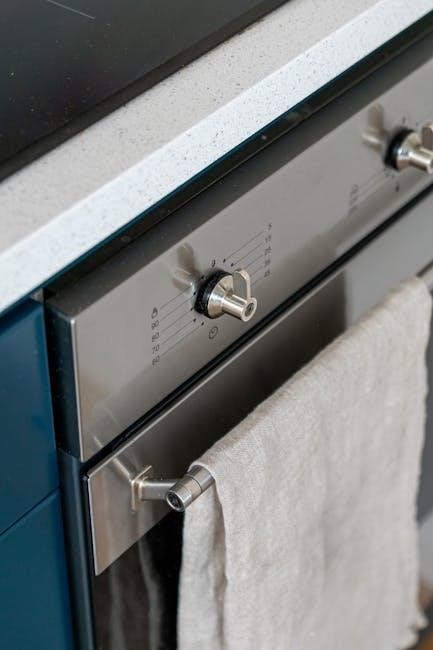
Control Panel Overview & Functions
The Maytag Gemini’s control panel, while seemingly straightforward, requires familiarization due to its somewhat inconsistent performance. Key functions include separate controls for the upper and lower ovens – temperature adjustment, mode selection (bake, broil, convection), and timer settings. The panel utilizes a digital display for clear visibility of chosen settings and remaining cook time.
Users should note that the responsiveness of the control panel can be variable, potentially leading to slight delays in registering inputs. Dedicated buttons are provided for frequently used functions, streamlining operation. Explore the panel thoroughly to understand each button’s purpose, as the manual suggests a learning curve exists due to the oven’s limited advanced features. Proper use ensures optimal, though potentially imperfect, cooking results.
Digital Display & Settings
The Maytag Gemini’s digital display serves as the central hub for monitoring and adjusting oven settings. It clearly presents the temperature for both the upper and lower ovens, selected cooking mode, remaining cook time, and any active delay start functions. Brightness is adjustable, enhancing visibility in various kitchen lighting conditions.
Settings customization is limited; however, users can toggle between Fahrenheit and Celsius. The display also indicates when the self-cleaning cycle is active. Be aware that, consistent with reported performance issues, the display may occasionally exhibit minor glitches or slow response times. Accurate timekeeping is crucial for precise cooking, so verify the clock regularly.
Oven Rack Positions & Adjustments
The Maytag Gemini double oven features multiple rack positions within each cavity, allowing for flexible cooking arrangements. Generally, positions are numbered from the bottom up, facilitating consistent placement for repeatable results. For baking, center rack placement is recommended for even heat distribution.
When broiling, adjust the rack to the highest position to maximize proximity to the broiler element. Roasting benefits from lower rack positions. Always ensure racks are securely seated in the rack supports before loading food. Due to reported inconsistencies, monitor cooking closely, as rack position may not always guarantee perfectly even results.

Using the Upper Oven
The upper oven offers standard baking and broiling functions, but be aware of potential performance inconsistencies reported with the Maytag Gemini model.
Baking Mode Operation
To utilize the baking mode in your Maytag Gemini upper oven, begin by pressing the ‘Bake’ pad on the control panel. The digital display will then prompt you to enter the desired baking temperature. Use the numeric keypad to input your selection, followed by pressing the ‘Start’ pad to initiate the baking process.
Remember that user feedback suggests potential inconsistencies in temperature accuracy with this model. It’s advisable to monitor your baked goods closely, especially during initial use, and consider using an oven thermometer for verification. Adjust baking times accordingly if needed. Ensure proper rack positioning for optimal heat circulation. For best results, preheat the oven thoroughly before placing your items inside.
Broiling in the Upper Oven
To broil within the Maytag Gemini’s upper oven, first select the ‘Broil’ function on the control panel. The display will indicate when the broiler is preheating. Position the oven rack to the highest or second-highest level, depending on the desired proximity to the heating element.
Always use broil-safe cookware. Monitor food closely during broiling, as it cooks rapidly and can burn easily. Leave the oven door slightly ajar during broiling to prevent overheating and ensure proper ventilation. Given the reported performance inconsistencies of this model, frequent checking is crucial. Remember to adjust cooking times based on your specific food and desired level of doneness.
Temperature Calibration (Upper Oven)
Given the Maytag Gemini MET8720DS’s documented inconsistent performance, temperature calibration of the upper oven is highly recommended. To calibrate, access the ‘Settings’ menu on the control panel – consult the ‘Digital Display & Settings’ section for detailed navigation.
Use a reliable oven thermometer to verify the actual oven temperature against the displayed setting. If a discrepancy exists, adjust the calibration setting in increments (typically 5-10°F) until the displayed temperature matches the thermometer reading. Repeat this process to ensure accuracy. Note that calibration settings are oven-specific and won’t affect the lower oven’s temperature. Regular calibration helps mitigate potential cooking inaccuracies.
Using the Lower Oven
The lower oven offers convection baking, roasting, and slow cooking capabilities, alongside a self-cleaning cycle for convenient maintenance of your Maytag Gemini.
Convection Baking Explained
Convection baking in your Maytag Gemini’s lower oven utilizes a fan to circulate hot air, resulting in faster and more even cooking compared to traditional baking methods. This consistent temperature distribution is ideal for baking multiple items simultaneously, ensuring each one cooks uniformly without the need for rotation.
To activate convection baking, select the “Convection” setting on the control panel. Remember that convection baking often requires a slight temperature reduction – typically 25°F – and potentially a shorter cooking time. Experimentation may be needed to perfect results with your favorite recipes.
For optimal convection performance, use the lower oven rack position. Avoid overcrowding the oven, as this can hinder air circulation. Convection is particularly effective for cookies, pastries, and roasting meats, delivering crispy exteriors and moist interiors.
Roasting & Slow Cooking (Lower Oven)
The lower oven of your Maytag Gemini is exceptionally suited for roasting and slow cooking, thanks to its larger capacity and consistent heat. When roasting, utilize the roast setting or manually set the temperature, ensuring ample space around the food for even browning. For larger cuts of meat, a roasting rack is recommended to promote air circulation.
Slow cooking benefits from the lower oven’s ability to maintain low temperatures for extended periods; Use a covered pot or Dutch oven to retain moisture. While a dedicated “Slow Cook” setting may not be present, manually setting a low temperature (around 200-250°F) achieves similar results.
Always use an oven-safe thermometer to verify internal food temperatures for safe and delicious results.
Self-Cleaning Cycle – Lower Oven
The lower oven of your Maytag Gemini features a self-cleaning cycle designed for convenience, but requires careful preparation. Before initiating, remove all racks, cookware, and any loose debris. Ensure the oven door can fully lock; do not attempt to open it during the cycle.
Select the desired cleaning duration – typically light, medium, or heavy soil – based on oven condition. The cycle utilizes high temperatures, producing odors and potentially smoke; adequate ventilation is crucial.
Once complete, allow the oven to cool completely before opening and wiping away any remaining ash. Caution: The oven surfaces will be extremely hot during and after the self-cleaning cycle.
Common Issues & Troubleshooting
Addressing performance inconsistencies with the Maytag Gemini MET8720DS, this section provides diagnostic steps for heating problems and control panel errors.
Oven Not Heating – Diagnostic Steps
If your Maytag Gemini double oven isn’t heating, begin with simple checks. Confirm the oven is properly plugged in and the circuit breaker hasn’t tripped. Verify the control panel is set to a baking or broiling function, and the temperature is appropriately programmed.
Next, inspect the oven’s heating elements – both upper and lower – for any visible breaks or damage. A faulty element will require replacement. If the elements appear intact, test the igniter (for gas models) to ensure it’s glowing and igniting the burner.
For electric models, use a multimeter to check for continuity in the heating elements. If no continuity exists, the element is defective. If issues persist, consult a qualified appliance repair technician, as internal wiring or control board problems may be present.
Error Codes & Their Meanings
The Maytag Gemini double oven utilizes error codes to signal potential malfunctions. A code like “F01” might indicate a temperature sensor failure, requiring sensor replacement. “F02” could point to a faulty heating element, necessitating inspection and potential element substitution. “F03” often signals an issue with the control board, potentially needing professional repair or replacement.
“F04” may relate to a door lock mechanism problem, preventing oven operation for safety. “F05” could indicate a communication error between the control panel and oven components. Always consult the complete error code list within the full owner’s manual for precise definitions.
Record the error code before contacting customer support, as it aids in faster diagnosis and resolution.
Control Panel Malfunctions & Resetting
If the Maytag Gemini’s control panel becomes unresponsive, first attempt a soft reset by disconnecting power for five minutes. This often resolves minor glitches. For a frozen display, try pressing and holding the “Clear/Off” button for three seconds. If buttons fail to register, check for debris obstructing their function.
Persistent issues may indicate a deeper problem with the control board itself. Avoid attempting self-repair of the control board; this requires specialized knowledge.
Document the specific malfunction before contacting Maytag support. A hard reset, involving disconnecting power and leaving it off overnight, is a last resort before seeking professional assistance.

Maintenance & Care

Regular cleaning of the oven interior, door seals, and bulb replacements are crucial for optimal performance and longevity of your Maytag Gemini.
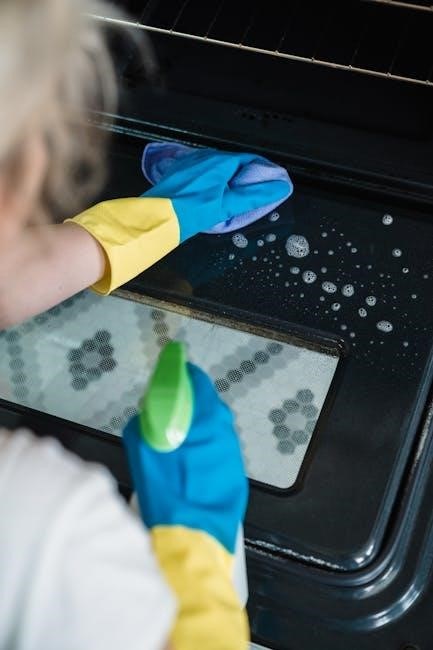
Cleaning the Oven Interior
Maintaining a clean oven interior is essential for efficient cooking and preventing unpleasant odors. For routine cleaning, allow the oven to cool completely before wiping down surfaces with a damp cloth and mild dish soap. Avoid abrasive cleaners, as they can damage the enamel coating.
For baked-on spills, create a paste of baking soda and water, apply it to the affected areas, and let it sit for several hours or overnight. Then, scrub gently with a non-abrasive sponge. The Maytag Gemini’s self-cleaning cycle (detailed in the Lower Oven section) offers a convenient, high-temperature cleaning option, but should be used sparingly to prolong oven life. Always remove racks and accessories before initiating the self-clean cycle.
Remember to thoroughly rinse all surfaces after cleaning and dry with a soft cloth.
Door Maintenance & Seal Inspection
Proper door function and a secure seal are crucial for maintaining oven temperature and ensuring safe operation. Regularly inspect the oven door hinges for smooth operation; lubricate if necessary with a food-safe silicone grease. Check the door seals (gaskets) around both the upper and lower oven openings for any signs of damage, cracks, or gaps.
A compromised seal can lead to heat loss and inconsistent cooking results. To test the seal, close the door on a dollar bill; if it pulls out easily, the seal may need replacing. Avoid slamming the door, as this can damage the hinges and seals over time. Gentle closing is always recommended.
Clean the door and seals with a damp cloth and mild detergent.
Replacing Oven Light Bulbs
To replace the oven light bulbs in your Maytag Gemini double oven, always disconnect the power supply at the breaker box to prevent electrical shock. Locate the light bulb cover within the oven cavity – typically found at the back of the upper or lower oven compartment. Remove the cover by unscrewing or gently prying it loose.
Carefully remove the old bulb, noting its type (incandescent or halogen) and wattage. Use only replacement bulbs specified for your model to avoid damage or fire hazards. Install the new bulb, ensuring it’s securely seated. Replace the light bulb cover and restore power at the breaker box.
If the bulb still doesn’t illuminate, double-check the connection and bulb type.

Safety Precautions
Always prioritize electrical safety and proper ventilation when using your Maytag Gemini. Utilize the child safety lock to prevent accidental operation.
Electrical Safety Guidelines
Ensuring electrical safety is paramount when operating your Maytag Gemini double oven. Always verify the oven is properly grounded to prevent shocks. Never use extension cords or adapters, as they can overheat and pose a fire hazard.
If the power cord is damaged, it must be replaced by a qualified technician. Disconnect the oven from the power supply before performing any maintenance or cleaning. Avoid operating the oven with wet hands or near water sources.
Regularly inspect the power cord for any signs of wear or damage. Do not attempt to repair electrical components yourself; contact a certified service professional. Adhering to these guidelines will help maintain a safe cooking environment and prevent potential electrical hazards.
Proper Ventilation Requirements
Adequate ventilation is crucial when using your Maytag Gemini double oven to ensure safe and efficient operation. The oven generates heat and moisture during cooking, which needs to be properly dissipated. Ensure sufficient airflow around the oven, maintaining a minimum clearance of several inches on all sides and above.
Avoid obstructing the ventilation openings. Using a range hood or exhaust fan above the oven is highly recommended to remove cooking fumes and moisture. This prevents condensation buildup and maintains air quality.
Poor ventilation can lead to overheating, reduced oven performance, and potential damage. Always follow the manufacturer’s recommendations regarding ventilation to guarantee optimal functionality and safety.
Child Safety Lock Feature
The Maytag Gemini double oven incorporates a Child Safety Lock feature designed to prevent accidental oven activation by young children. This function disables the control panel buttons, rendering the oven inoperable without deactivation. To activate the lock, typically a combination of buttons must be pressed simultaneously – consult your model’s specific instructions.
When engaged, the control panel will display a lock indicator. Always ensure the lock is activated when children are present or when the oven is not in use.
To deactivate, repeat the button combination. Regularly check the lock’s functionality to confirm it’s working correctly, providing a crucial layer of safety within your kitchen environment.

Warranty Information & Support
Maytag provides warranty details for the Gemini oven, alongside customer service contact options and resources for locating genuine replacement parts if needed.
Maytag Warranty Details
Your Maytag Gemini double oven is covered by a limited warranty, protecting against manufacturing defects in materials and workmanship. The standard warranty typically begins on the date of original purchase. A one-year limited warranty applies to all parts and labor.
For specific coverage details, including exclusions and limitations, please refer to the separate warranty document included with your oven. Extended warranty options may also be available for purchase, providing additional peace of mind beyond the initial coverage period.
Keep your proof of purchase readily available, as it will be required to initiate any warranty claim. Registering your appliance with Maytag can streamline the process and ensure you receive important updates and notifications.
Contacting Maytag Customer Service
Should you encounter any issues with your Maytag Gemini double oven, Maytag’s dedicated customer service team is available to assist. You can reach them via phone at 1-800-629-4488, available Monday through Saturday. Alternatively, visit the official Maytag website at maytag.com for comprehensive support resources.
Online resources include frequently asked questions, troubleshooting guides, and the ability to schedule a service appointment with a certified technician. Live chat support is also often available for immediate assistance. When contacting support, have your model number (MET8720DS or similar) and serial number readily available to expedite the process.
Finding Replacement Parts
Locating replacement parts for your Maytag Gemini double oven (MET8720DS and similar models) is crucial for maintaining its functionality. The official Maytag Parts website (maytag.com/parts) offers a comprehensive catalog searchable by model number. Alternatively, authorized Maytag parts retailers, both online and brick-and-mortar, stock a wide range of components.
Commonly needed parts include oven racks, heating elements, control panel overlays, and door seals. When ordering, always verify the part number to ensure compatibility. For more complex repairs, consider consulting a qualified appliance technician to diagnose the issue and recommend the correct replacement parts. Genuine Maytag parts are recommended for optimal performance and safety.